Showing posts with label fall crop. Show all posts

Saturday, October 18, 2008

Rings around the Moon.

With the nights getting cooler and temperatures dropping in general, we are seeing lots of neat changes; the leaves, the yard and even in the sky. This past Monday night, we went outside to take a look at an enormous ring around the moon. Pretty intense sight and I tried my best to get a picture of it. It ends up that this
ring is a relatively common and is the result of the moonlight being refracted by upper atmospheric ice crystals. These ice crystals dissipate quickly so the rings are often only seen for a short period of time.
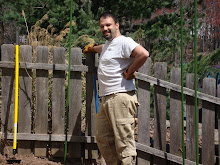
With a good stretch of cold nights, the garden is 90% finished for this year. I will have to start ripping out the tomato plants and pepper plants. We've harvested almost 90% of the edible radishes; with Jen's comments that they are starting to get "woody", the rest will come out as well. The only thing left will be the beets and I plan to let them go for another month or so. Once the bottom bed is cleared, I can start building the second retaining wall and replacing the broken garden gate and fence. I am still undecided on replacing the gate with a gate and arbor combination. I guess I will make that decision when I have the time to start it and the money to pay for it. It should only cost about $100 in lumber for everything.

Magnolia Tree Seed Pod (found by Jen)

I received my Seed Savers Exchange seed garlic this week. I am going to try to plant three varieties for our use but also to re-list them in the SSE 2009 yearbook. I have not a clue of what I am doing nor the best place to plant it so this is going to be one big experiment. I hope to have it in the ground this weekend. One potential place for it would be the new planting bed I am getting ready in my front side yard. I would also like to put potatoes, peppers and radishes in this bed in the spring. The only hurdle is that I need about 3 hours to finish getting the bed ready (removing the grass, adding peat and manure, top dressing it with mulch) and I am not feeling it today.

There has been a continuation of the indoor things that are happening to prepare us for winter as well as just finishing up the small started-but-unfinished projects around the house. The list of things started to get a little crazy as you can see from the picture (that is just Sunday's list). Seems that the little things sure add up quick and they also make a mess of vacation; I need a vacation from my vacation. Needless to say, 90% of the work is done, small polishing things left to finish up and we are settled in ready for the winter.

Food Harvested:
Radishes

Things Planted:
Garlic
Transplanted grasses

Seeds Saved:
Daylillies
Jen saved Magnolia...very odd looking.

Preserved/Cooked:
Whole Chicken
Repeat of the lamb shanks

Things to Remember:
1. Tomato seeds to be started inside in Feb
2. Peppers to be started with Tomatoes
3. Peppers will need small cages or support
4. Garlic to be planted in up front bed with potatoes and radishes

Thursday, September 18, 2008

The fall planting experiment is turning out better than expected. Jen and I are getting a few radishes every day and the Beets are growing well now that the nights are getting cooler. Although Jen is thinning, it still remains an issue. She proposed a different planting method rather than just spreading the seeds. Also to plant the seeds a little deeper than just surface sowing. Some of the radishes are starting bolt and I am considering letting them so I can save some seeds for next year.

I am patiently waiting for the 3 varieties of garlic I requested from the SSE yearbook. They should show up in the next two weeks and based on the cool nights (60-65), I will have to get them in the ground ASAP. I will put some in where the existing Cukes are and I still have to figure out where to put the rest. I am considering the front bed once I remove the ornamental grasses that are crowding everything else out.


Thinking ahead to next spring, I am considering planting many more fruit bearing shrubs and trees. The four heirloom apples have all come back from the deer feast and should be stable enough to move out of the holding bed to their permanent spots by April. By then, these will be 1 year old grafted trees and will take about 2-3 more years to bear fruit. Because of planting space limitations and my want for many other plantings, I am considering giving 1 or 2 to neighbors so they can still pollinate one another.

With Jen working later than normal this week, I spent some time with the Seed Saver's Yearbook and found a member who offers figs (I cannot believe that there are over 300 varieties listed!!). I will probably get 3-4 fig trees and I finally found an online nursery where I can get 5-6 thorn-less blackberries. Jen and I have also been toying with the idea of building a rather large pergola and if we move in that direction, I would like to plant Reliance Grapes to climb and offer natural shade during the summer. One concern with the grapes are the bees and dropping fruit. As a back-up plan, I am trying to figure out if I could build a grape trellis across the back of my yard but I think I may be getting carried away; I have limited space and I am planning as if I have an acre to work with.

Easy Carrot Cake
  • 2 Cups shredded carrots
  • 2 Cups Sugar
  • 2 Cups Flour
  • 4 Eggs
  • 1/4 cup Olive Oil
  • 1 tsp salt
  • 2 tsp baking soda
  • 2 tsp baking powder
  • 2 tsp Cinnamon

Preheat the oven to 300 degrees. Mix together all the wet ingredients. Mix together all the dry ingredients. Mix together the wet and dry ingredients. Put into a pre-greased 10x10 or 9x13 pan. Cook for 1 hour or until a toothpick comes out clean. While it cooks, make the icing.

  • 8oz Cream Cheese - room temperature
  • 1/2 stick melted butter
  • 1 box confectioners sugar
  • Vanilla to taste (I use 1/2 tsp)
Cream the cream cheese and butter until smooth. Add sugar little by little until all incorporated and smooth. Add vanilla until taste is right.

Food Harvested:
Tomatoes (mostly Cherries, Italian Market Wonders and Mortgage Lifters

Things Planted:
Peach and Nectarine Pits (Squirrels are loving it)

Seeds Saved:
Black Krim Tomato
Wilson's Sweet Watermelon (again)
Sultan's Golden Crescent Pea

Preserved/Cooked:
Homemade Roasted Red Pepper Ravioli (Locally made cheese)

Things to Remember:
1. Jen mentioned different seed planting for the radishes - like seed tape to space better
2. Begin bottom bed border (4x6s) and build new arbor and gate - need to cut back lilac and level the entry way
3. Moving any established bushes need cooler weather but before the first frost.

Tuesday, September 16, 2008

Apples Abound

With apple season starting, Jack and I went to a local pick-your-own farm on Sunday. One of the first apples to pick happened to be my favorite, Honeycrisp. Jack was so excited he could barely contain himself. He needed to sample every piece of fruit he grabbed which left about half the apples we brought home with teethmarks
(which is why applesauce was invented, I suppose). I always assumed that pick-your-own would be cheaper than buying in a store and I guess it is when buying small quantities but excitement overtook us and when Jack and I finished 15 minutes of picking, we filled a bushel. 1 bushel=20lbs x $2.50/lb = $50. In addition to this, we walked over the nectarines and picked 15lbs of some of the largest most delicious nectarines I have ever tasted. All done, we had over 35 lbs of fruit at the low price of $74.

Fearing the apples rotting before we could eat all of them, I decided to make and can apple sauce. Not really knowing what I was doing, I pulled a recipe from my canning book and Charlotte and I started . Next time I think I wont peel and core them as the food mill will take care of removing the skin and pits.

Apple Sauce


Apples - peeled, cored and chopped (about 8-10 lbs)
1/4 cup sugar
4 tsp Cinnamon

With a minimal amount of water, we cooked the apples for 20-30 minutes and then ran them through a food mill. Once we had apple sauce, we added 1/4 cup sugar and 4 tsp Cinnamon and brought back to a boil. After canning and processing, we had about 5 pints and 3 half pints of apple sauce.


Determining the ripeness of watermelons is more magic than science as I am finding out. First melon was underripe due to my over zealousness. Now that I am too cautious, two small melons went ripe and rotted on the vine. In checking the pigtails opposite the melons, they were still green and alive so out goes that trick in determining ripeness. In fear of losing the last large melon, I inspected it with a critical eye and noticed pitting on the rind. The pigtail just started to turn brown but was still mostly green. Although I wasn't sure, I picked to to prevent the pitting from getting worse. As a dessert to the lamb dinner, Jen and I cut the melon and it was ripe!!! Although it was not deep red as expected, it was extremely sweet, so much so that I ate 1/4 of the melon. This leaves me 1 more softball size melon on the vine.

As for garden itself as the fall starts, I finally did manage to build the retaining wall for the upper bed. 6 - 8 foot 4x6's and 16-12"galvanized spikes later with two helpers, the wall was in and the walkway was leveled. Jack and Charlotte took turns with my hammer and drove the spikes in. Jack gave me pointers on how to shovel the dirt and Charlotte ate all the ripe tomatoes she could find. Now, with the top bed done, I need 3 more 4x6s to build the edge of the bottom bed which will have to wait until the tomatoes are done. In addition to this, the old fence and gate broke yesterday so I will need to rebuild that as well.

With a few days of very cool nights and wet days, the tomatoes went into ripening overdrive and the cherry tomatoes started splitting. 3 plants have given up all of their fruit and what fruit is left is still small. The only exception is the cherry tomatoes. They seem to still be as loaded with fruit as they were in the spring. Radishes are beng picked almost daily and the beets are growing well. The golden beets however are still strugglingwth maybe 10% germination.

Slow Braised Lamb Shanks

2 lamb shanks - cut to bone at base of shank
1/4 cup flour
1/2 tsp cayenne pepper
2 tsp paprika
Salt and pepper to taste
3 tbsp olive oil
1 large yellow onion
4 celery stalks , rough chopped
4 carrots - unpeeled, rough chopped
1 Tbsp tomato paste ( i used one peeled, seeded garden tomato)
3-4 sprigs rosemary
1 head garlic, top cut off
3-4 cups chicken broth
1/4 cup red wine or sweet wine ( I used sherry)

Preheat oven to 300 degrees. In either a roasting pan or dutch oven, heat oil until hot. Mix flout, paprika, cayenne pepper, salt and pepper and dredge shanks to coat well. Braise shanks in pot/pan on all sides for 3-4 minutes. Remove from pot and set aside. Add onions, celery and carrots. Cook for 2-3 minutes stirring to ensure they don't brown or burn. Add back the shanks settling them in one layer ( if possible). Add chicken stock, wine, garlic, rosemary and tomato paste to cover 3/4 of the lamb. Bring to a boil, stir, cover and place in the oven for 4 hours. Every hour, turn the lamb and ensure there is enough liquid, if needed, add more stock.

Once done, remove lamb to plate and cover with foil to keep hot. strain liquid to remove all veggies, and heat liquid thickening to coat spoon for the gravy. Thickening can be done by blending some veggies or using flour whisking briskly as the liquid is returned to a boil.

I also pick through the veggies to pull out the carrots to serve as the vegetable. They are "stewed" and full of flavor. Serve with garlic mashed potatoes (garlic reserved from the pot).

Food Harvested:
Wilson's Sweet Watermelon
Radishes (red globe and white icicle)
Tomatoes (all types)

Things Planted:
None

Seeds Saved:
Wilson's Sweet Watermelon

Preserved/Cooked:
Canned Apple Sauce
Braised Lamb Shanks (from local farmers market)

Things to Remember:
1. Build new fence and gate into garden area
2. Ready cucmber area for SSE garlic planting
3. Devise way to walk in upper bed
4. Find organic solution to powdery mildew

Saturday, September 6, 2008

Fairy Houses at the Beach

With all of us being on vacation for most of the past week, not much happened in the garden itself. I keep looking and seeing different ideas to rearrange and rebuild the garden but at this point, they will only be ideas. As for the beach, Jen went with the kids a day earlier so I could get a full 24 hours of work on the house done. I managed to paint the living room, build a lattice barrier so the dogs don't cool off in mud and dirt and I re-caulked the bathroom. Now that I write this it does not sound like much but the hours flew by. This was my first night away from the kids since Jen gave birth and one would think that a quiet peaceful night would be welcomed. In actuality, I had a hard time sleeping and come morning I missed the usual AM banter for chocolate milk and "lets play".

There were 11 of us at the beach this year including Jack and Charlotte's cousins; Luke and Noah. Each and every year, the family goes to Lavalette NJ to mark the end of the summer and that was no different. What was different as well as being evident was the ways in which Jen and I have gravitated in terms of lifestyle, choices and children. These differences in Jen and I is what motivates us to go to the farmer's market to buy locally, plant an organic garden, look to conserve and reuse rather than replace. Simple things like composting and recycling on one end to Consensual Living, Co-Sleeping and Attachment Parenting on the other end.

All in all, the kids played every day loving the beach and the water. Charlotte was fascinated with picking up EVERY shell she came across while Jackson just played; digging, running, making sand castles.....If I were asked to sum up the vacation in a sentence or two, I would be Jen helping both kids build fairy houses. This consumed much of an afternoon and that night as well as the next day conversation was around the likely hood o the fairy houses will still be standing and not washed away by the tides. When we packed up on Friday afternoon, the kids were shot and Charlotte slept for the hour ride home. Jackson zoned on nothing and played with new stickers from Maga (Grandma Laura). Come bed time, they were fast asleep within minutes.

Coming back to an unattended garden is fun, exciting and overwhelming all wrapped together. Even though I was only gone for three days, it looked like I never weeded, picked a thing all summer and let the dogs play in middle of the plants. I quickly noted all of the chores I have neglected and immediately remembered all of the projects I wanted to accomplish with my vacation. On the other hand, I picked about 10lbs of ripe tomatoes, Sultan's Peas, and a large stalk of Basil. The cucumber all have died on the vine but the fall planting are doing wonderful. I got my first fist full of radishes and the Chioga Beets are doing well. There are a few very small sprouts for the carrots but the golden beets are non-existent.

Roasted Red Pepper Soup

4-6 Red Bell Peppers
1 large White Onion sliced
4 cloves of Garlic - chopped
1 Tbsp Marjoram
2 Tbsp Sweet Paprika
4 cups Chicken Stock
1 cup day old Italian bread, processes to almost bread crumb consistency
Salt and Pepper to taste


Turn oven to 500 degrees and place peppers (whole) on a cookie sheet onto a high rack. Turn peppers frequently. The peppers should become black and burned on all sides. Take out and place onto foil sealed into a pouch or in a container closed loosely for 10-15 minutes or until cool enough to handle. Once cooled, skin, cut, core and clean peppers retaining any juices that are produced.

Pre-heat the oven to 400 degrees. Place Onions, garlic and enough olive oil to coast onto a sheet pan. Add Salt, Pepper Paprika and Marjoram and toss to coat. Place in middle of oven for 20-30 minutes, toss often and cook until golden.

In a food processor, place all the peppers and onion mixture with any retained juices (can be done directly in the soup pot if you have a emulsion blender). Pure to a smooth consistency (add a little Chicken Stock if needed). Add 2 cups chicken stock and re-puree, then the next 2 cups. Once all is processed, place in a large soup pot and gently simmer on the stove. Add slat and pepper to taste. Served hot or cold (gazpacho like).

Food Harvested:
Tomatoes - first Yellow Ponderosa's
Radishes, both varieties
Sultan Crescent Peas
Things Planted:
None

Seeds Saved:
None

Preserved/Cooked:
Roasted Red Pepper Soup

Things to Remember:
1. Plant Brussel Sprouts 3 months prior ot the first frost - 24" apart
2. Move tomatoes to higher in the garden - 5 rows of 3 plants per row
3. Plant Garlic in front raised bed
4. Plant Hungarian Pepper as decoration throughout front


    Friday, August 29, 2008

    Not So Ripe....

    Jen and I have been going to the Summit farmers market for a few weeks now and one of my favorite stands brought watermelons this past Sunday. Knowing that I have not the slightest idea on figuring out when mine would be ripe, I decided to ask the stand. It was real interesting to see everyone at the stand shrug then default to the owner. When the question reached him, his initial reaction was a slight chuckle. He did tell me that 90% of the time, the tendril (pigtail) that is opposite of where the melon attaches will start to shrivel and die. When this starts, the melon should be picked within a few days. I was so excited that when I got home my curiosity got the best of me and I cut open the biggest watermelon in the patch...Much to my chagrin, the result was an under ripe, only slighty pinkish flesh. The kids tried a slice despite our warnings and made funny faces before spitting out the whole bite.
    I guess I need to have patience with the last two melons.

    With the nights uncharacteristically cool through the end of August, some of my tomatoes do not seem as happy as I would like to see them. Jackson and Charlotte seem to not mind as they tramp into the garden with me to pick about 5lbs a day now. Still tops on Charlotte's list is the yellow cherry and although Jack keeps pointing to them all as his favorite, I think if push came to shove, he would side with the yellow cherries as well. Jen has settled on the Marglobe for hers and I can't fault her. It is medium red in color and slightly smaller than a tennis ball.

    Most of the radishes have sprouted. The coolness is however working well for the new seedlings. We should be able to start harvesting within the next two to three weeks. As for the beets and carrots, the Chioga have seem to germinate the fastest and closest to 100% whereas the carrots and golden beets still seem to be struggling to germinate. In the spring I was concerned that it was something I had done wrong but now, I am leaning more toward a seed issue. Next year I think I am going to expand my fall plantings to include chard and spinach. Early success here has made me want to plant more and more next fall.


    Food Harvested:
    All tomato varieties except the Golden Ponderosa
    Round 4 of the sultan pea
    Unripe watermelon #1

    Things Planted:
    none

    Seeds Saved:
    Marglobe Tomato
    Purple Cherokee Tomato

    Preserved/Cooked:
    None

    Things to Remember:
    1. Next fall, plant more of a fall crop
    2. Replace left over carrot and golden beet seeds due to poor germination
    3. Teach Charlotte what ripe vs. green tomatoes are
    4. Keep away from Orange Queen Tomatoes, although small and pretty, not much flavor for me.
    5. Fence off watermelon area from deer.

    Friday, August 22, 2008

    Tomatoes Galore

    Tomatoes are starting to come in now. Seems that they are about 2-3 weeks behind most other people's plants. I think I need to not winter SOW the seeds but start them indoors in Feb. and let them get some size before I transplant. The plant sizes are now mostly slowing down in growth and topping off at about 7 or 8 feet for most of them. So far, the best tasting tomato has been the Marglobe and Purple Cherokee. The Black Krim was good but a little bland, the black cherries were not as sweet as I would have wished but the yellow cherries are a huge hit with the kids. Although Jen is not much of a fan of Cherries, I will grow them for the kids every year, maybe even two plants. Their appetite for tomatoes is insatiable.

    The radishes sprouted (both white icicle and red globe) and I also just noticed the Chioga Beets starting as well. Nothing for the carrots or the golden beets. With the Chioga starting as quickly as they did, I am not so quick to blame myself for doing something wrong. Once the garden starts to finish up, I think I have decided to buy some 4x4's and build up the upper bed to better define the walkway. Eventually I can do the same to the bottom bed and have a fully defined walkway where I can lay weed barrier and nice stone. I have to make sure Sam the Scarecrow is OK with it first though.

    Jen and I discovered the Summit Farmer's Market which is 10x better than Scotch Plains and Westfield. There are about 10 vendors including fresh seafood, local beef /lamb/poulty, local cheese and the kids favorite, a pickle vendor. This past Sunday was our second time going and we managed to plan meals relatively well. We ate two local meals where nothing came from out of the state (except butter, sea salt, butter and olive oil). We have been eating a lot of red beets, chard and fresh eggs all from here.


    Oven Baked Sea Scallops:

    • 1lb Sea Scallops (about 12-15 scallops)
    • 4 Tbsp melted butter
    • 5 cloves garlic, minced
    • 2 large shallots, chopped
    • 2 pinches ground nutmeg
    • dash of salt
    • 1 cup seasoned breadcrumbs
    • 1/4 cup fresh grated Parmesan Cheese (optional)
    • Olive Oil

    Preheat oven to 350 degrees. Clean, dry and place scallops in a bowl. Add melted butter, garlic, salt and nutmeg and scallops and mix. Place in baking dish arranging to one layer. In a separate bowl, mix breadcrumbs, cheese (optional) and enough oil to see it START to clump (about 4 Tbsp). Pour evenly over the scallops and place dish in the oven for 45 minutes or until the breadcrumbs are browned.

    Food Harvested:
    Tomatoes, Tomatoes, Tomatoes
    Lemon Cukes

    Things Planted:
    Nothing

    Preserved/Cooked:
    Carrot Cake
    String Bean Salad
    Local Sea Scallops

    Seeds Saved:
    Nick's Yellow Cherry Tomato
    Black Cherry Tomato

    Things to Remember:
    1. Use 4x4 to clean up the edges of the garden
    2. DO not plant so heavily on the cukes
    3. Move the tomatoes to the higher part of the bed
    4. Tomatoes need more spacing

    Sunday, August 10, 2008

    Scarecrow Sam

    With Jen wanting a clothes line for the last few years and no real place to put a temporary one, I finally went to Home Depot for the 4x4's and pulleys for a permanent one. Charlotte and I spent about an hour getting different things and when we got home, Jack came running to the gate to tell me that I had to go pick something in the garden. To my surprise, Jack led me by the hand and introduced me to Sam the Firefighting Scarecrow. I think he will be a recurring permanent fixture in the garden. I particularly like the fire boots, fire hat, pearls and silver necklaces. He however did scare the bejesus out of me when later I was digging, bumped into him as I caught a glimpse of him out of the corner of my eye; I really though it was someone in the garden with me!!

    Tomatoes are starting to come in. Got our first Marglobe which the kids promptly split for lunch and a Black Krim. The Cherry Tomatoes are starting to come in regularly and Jen decided to try her hand at photography.....Next Year I want to try some different staking methods without cages. The cages became too much and were way too small. Most of the plants especially the Black Cherry and Nick's Yellow Cherry are approaching 8 feet tall and the Mortgage Lifter and Italian Market Wonder need much more support as they are prolific producers so far.

    Fall planting from my understanding should happen about 6 weeks prior to the first frost. Since that would be now, I returned that upper half of the garden, flattened out the rows, removed all weeds and planted more like a square foot gardening method. I replanted the rest of the Icicle Radishes, heirloom carrots, golden beets as well as picking up chioga beets and organic red globe radishes. This will be my first attempt at fall cropping and square foot gardening methods so we'll see.

    Last weekend Jen was not feeling great again. She decided to man-up and we took the kids peach picking. It is the beginning of the season in NJ so the only peaches ready were donut peaches. These are small but packed with flavor. Jack and Charlotte managed to pick just over 10 lbs in less than 30 minutes. Since they were not 100% ripe, into a paper bag they went for 2 days. The end result, I am sick of peaches but I managed to cook a peach pie that Jen and the kids loved.

    Peach Pie
    • Pie Dough - enough for a top and bottom
    • 5 cups skinned and sliced peaches
    • 2 Tblsn Lemon Juice
    • 1 cup sugar
    • 1/2 cup flour
    • 1 tsp nutmeg
    • 1 tsp Cinnamon
    • 1/2 tsp salt
    • 2 Tblsn butter

      In a bowl, mix all dry ingredients. Toss the peaches with the lemon juice to coat then with the dry ingredients. Turn into a pie crust. Break butter into bits placing on top. Cover with second pie crust and place little slits to allow steam to escape. Place into a 450 deg. preheated oven for 10 minutes then reduce heat to 350. Cook for 40-45 minutes or until bubbling. Let cool completely before serving.

    New format for me stealing some ideas from other blogs I follow. To help me when I go back to older posts and as a reminder:

    Food Harvested:
    Cherry Tomatoes, Sultan Beans, Last of the Squash

    Things Planted:
    Golden Beets, Chioga Beets, Icicle Radishes, Red Globe Radishes, St Viceroy Carrots

    Things Preserved/Cooked:
    Peach Pie

    Seeds Saved:
    Yellow Yarrow, Harbinger Peas

    Things to Remember:
    1. Thinning of all things is required. I did not believe in this in the spring and I got very few small carrots, radishes and beets.
    2. Prepare for larger tomato plants than your 3 foot cages will support.
    3. Weed, Weed, Weed. Letting it go will allow it to overtake your garden
    4. Start seeds for Toms and Peppers earlier - like January indoors.